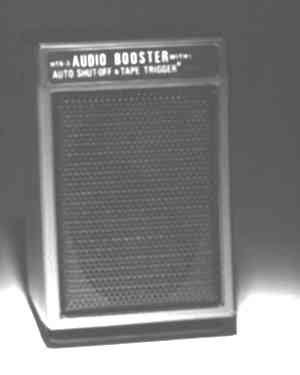
HTS-1 Booster Amplified Speaker System
The HTS-1 and HTS-2 systems are designed especially for use with handheld radio transceiversbut are also ideal for use with personal portable stereo radio/tape players. Thanks to the built-in amplifier, efficient speaker and auto shut-off "sleep" feature, you can enjoy big radio sound and long battery life.
1. Remove the battery compartment cover on the rear of the unit by lifting the "OPEN" lever and pulling the cover towards you.
2. Place 4 UM-3 (AA) batteries in the compartment taking care to observe the polarity marked by each terminal.
Connect the stereo jack to your H.T. and mono jack to the speaker input. An optional stereo splitter cord is available when two speakers are used. Operation Switch the Booster "ON" to activate the built-in amplifier. If no output is noticed for approximately 10 seconds, a special sensor places the amplifier in "sleep" mode and current consump- tion is drastically reduced allowing the unit to operated for 2-3 months under normal conditions before the batteries are exhausted.
In "NORMAL" position the amplifier is bypassed, power is shut off completely and the input jack is connected directly to the speaker. The extinguished power LED on the front panel indicates that the amplifier may be shut off or in the sleep mode. Do not leave the unit in sleep mode for long periods as even though current drain is low, the batteries will eventually drain.
The HTS-1 will operate on all voltages from 5 to 15 volts DC. External power is supplied to the DC jack on the HTS-1 rear panel. WARNING: Observe proper polarity - the center connector is negative (-). Batteries must be removed when using external power. The HTS-1 is equipped with a NiCad battery charger as standard equipment. To charge properly, the external power source must be 13.8 volts DC (nominal 12 volt battery or 12 VDC wall charger). Using any other voltage will result in damage to the NiCad Bat- teries.
The unit housing should be cleaned with a soft cloth dampened with water only. Never use strong cleaning agents as the finish may be deformed or discolored. Caution Always remove batteries when the HTS-1 will not be used for some time. Even "leak proof" batteries can leak damaging chemicals. Never leave weak or damaged batteries inside the unit.
Heavy duty cigar plug with 5 ft. cord, DC jack and indicator lamp.
Condenser
microphone for base type operations with H.T.
Connect the short cord supplied between your cassette recorder's tape "remote" jack and the HTS-2's "remote" jack. NOTE: The supplied cord has a different size jack on each end. The small jack (2.5 mm) fits the tape recorder and the large jack (3.5 mm) fits the HTS-2. NOTE: some tape recorders use a negative common and others, a positive. For this reason, we have provided 2 remote cords. Use the cord that works on your particular recorder. One extends normal polarity and the other reverses polarity. Place the HTS-2 next to the recorder's built-in microphone and connect your HT. When the radio channel becomes active, the HTS-2 will trigger the recorder. Approximately 5-10 seconds after the channel becomes idle, the HTS-2 will shut down and stop the tape.
Now you can connect a wide range of DC voltages (5-16VDC) of either polarity. The HTS-2 senses polarityand switches in the appropriate compensation automatically. The HTS-2 is voltage regulated for charging NiCad batteries, but in this case the external power must be in the range 8-16VDC to give the normal charge rate of 14-16 hours. External voltage can be as low as 6.5 volts to charge NiCads but charging time increases substantially.
The automatic shut-offcircuit draws only micro-amps allowing the HTS-2 to remain in the turned on idle condition "sleep mode" for up to 3 months before the need to change your batteries.
Level control is normally provided by the radio's volume control, however a trimmer control is accessible through the battery compartment to vary the input impedance somewhat in special cases. Normally the factory adjustment is sufficient and the trimmer need not be adjusted.
Contact your local dealer or the manufacturer directly. Warranty returns must be pre-authorized and accompanied by a copy of the original sales receipt.
Click here to see a report on the HTS-3
.
![]()
e-mail ..sales@naval.com
Naval
Electronics, Inc.
7028 West Waters Ave Suite 393,
Tampa, Florida
USA 33634
phone (813) 885-6091
fax (813) 885-3601